
LAN Network Interface Setup Guide
A LAN (Local Area Network) Network Interface is a hardware or software component that enables a device to connect to a local network, allowing it to communicate with other devices within the same network.
To Create LAN Network Interface,
Go to Profile –> Network Interface–> click on +Create Network Interface.

Configure the Interface Settings
- Name: Enter a descriptive name for the interface (e.g., LAN_1, WAN_1).
- Description (optional): You can add a description to explain the purpose of the interface (e.g., “Primary LAN connection” or “WAN connection to the internet”).
- On the Network Interfaces page, you will see options to create a LAN interface.

1. To Create LAN Interface:
- In the Port Configuration Tab, look for an option to select Hardware & Ports.
Choose the Hardware that you intend to configure as a LAN port.
- After selecting the device as LAN, a list of available ports will be displayed.
Choose the specific Port you want to configure for LAN

Click on the LAN (IPv4) Configuration Tab
- Enter the Gateway IP Address for the LAN.
- Provide the appropriate Netmask (Subnet mask) based on your network configuration. This defines the range of IP addresses that can be used within the LAN.
- You will have three options related to DHCP configuration:
Enable DHCP: The device will assign dynamic IP addresses to devices connected to this LAN port.
Enable DHCP Relay: This allows the device to relay DHCP requests to an external DHCP server.
None: No DHCP service will be provided from this device.
Choose the option that best fits your network setup. If you’re unsure, Enable DHCP is a common choice for assigning IPs dynamically within the LAN 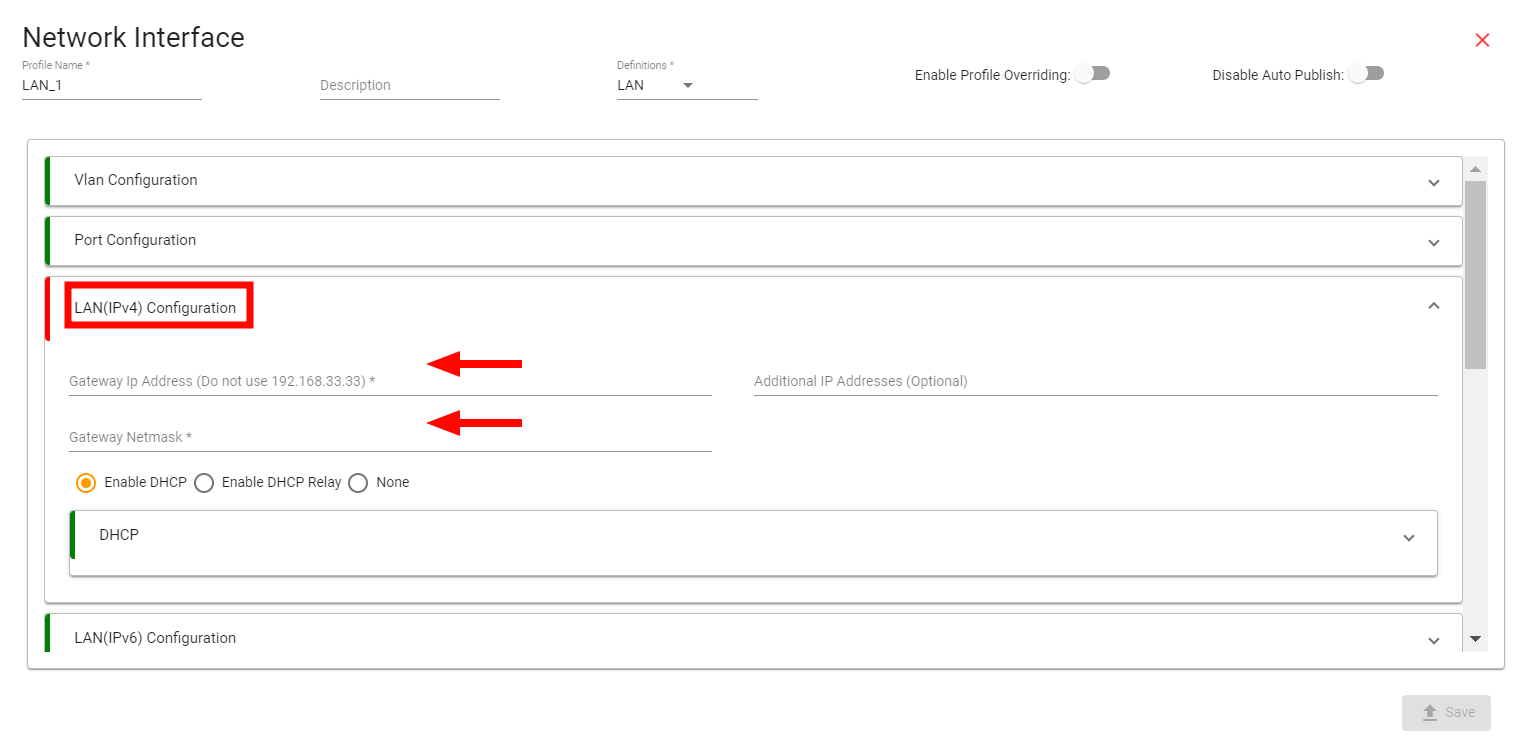 DHCP Configuration Options
- After assigning an IP address with the subnet mask, a range of IP addresses is generated.
- To enable DHCP, select the DHCP option as shown in the figure, and configure the following parameters according to your requirements:
-
DHCP Start Range: The starting IP address of the DHCP allocation range.
-
DHCP Limit: The number of IP addresses to be allocated for DHCP.
-
DHCP Lease Time: The duration for which an IP address is leased to a client, specified in hours or minutes.

Option DNS (Optional)
- Click on Custom to assign a specific DNS server as per your requirement and if you have dedicated server, add Ip Address on given range.
Note:
This option does not work in the case of Captive Portal.

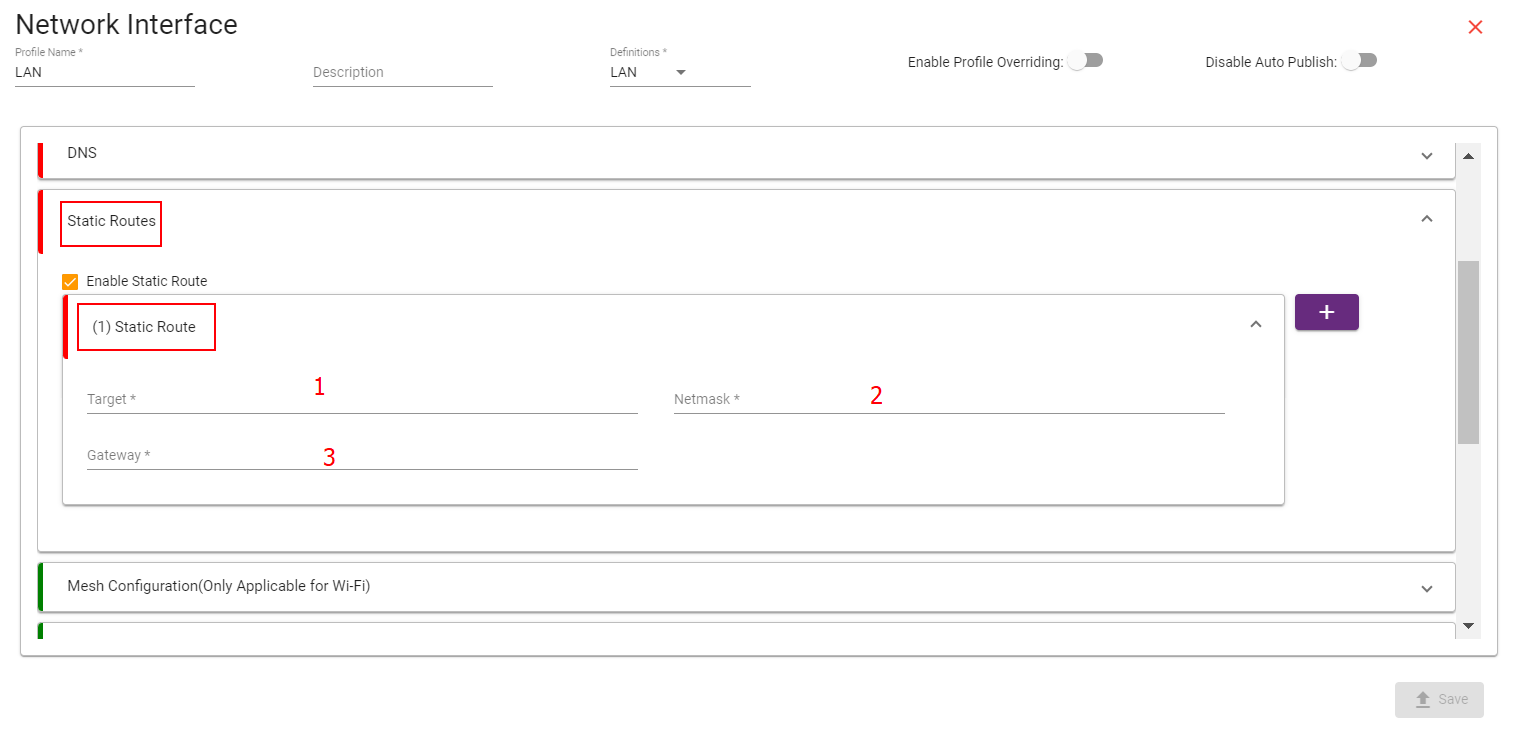
Static Routes (optional)
- Click on Static Route option, Enable Static Route.
- Add the below parameter as per your requirements.
Target: Add Destination Ip Address
Netmask: Add Subnet mask of Destination Address
Gateway: Add Gateway Ip Address
-
To Disable NAT from your Network, Click on Outbound Forward Rules (optional)—> Interface—> Remove tick marks.

- To change Speed and Duplex, Go to Speed and Duplex Configuration (optional)
Change from dropdown tab.
