
WireGuard Hub and Spoke L2 Tunnel Configuration Guide
This guide explains how to configure a WireGuard Hub and Spoke L2 tunnel from the Ray Cloud portal. In this setup, the Hub and Spoke appliances are connected through a WireGuard tunnel, and the selected LAN ports are bridged over the tunnel to allow Layer 2 traffic between both sites.
Step 1: From the top menu, click on SD-WAN.
Under SD-WAN, make sure you are on the Networks tab.
Now click on Create WireGuard Network.
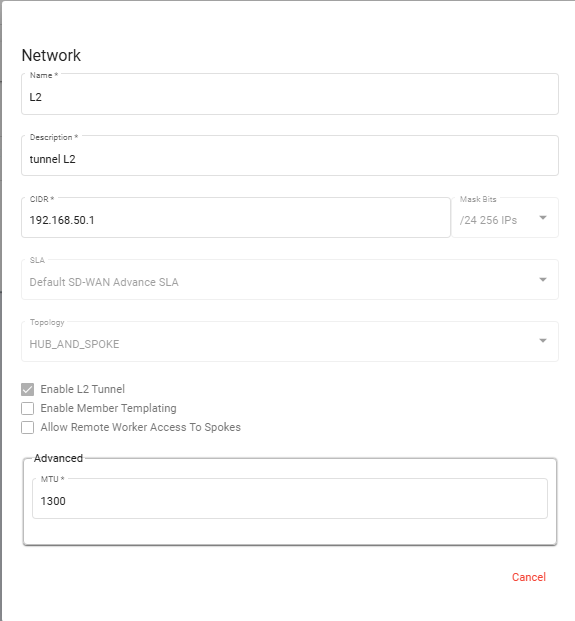
Step 2: Create WireGuard L2 Network
On the network creation page, fill in the required details.
Step 3: Open Network Members
After the WireGuard network is created, it will be visible in the SD-WAN Networks list.
Click on the three-dot action menu on the right side of the created network.
Select View Members.
This will open the Members page for the selected WireGuard network.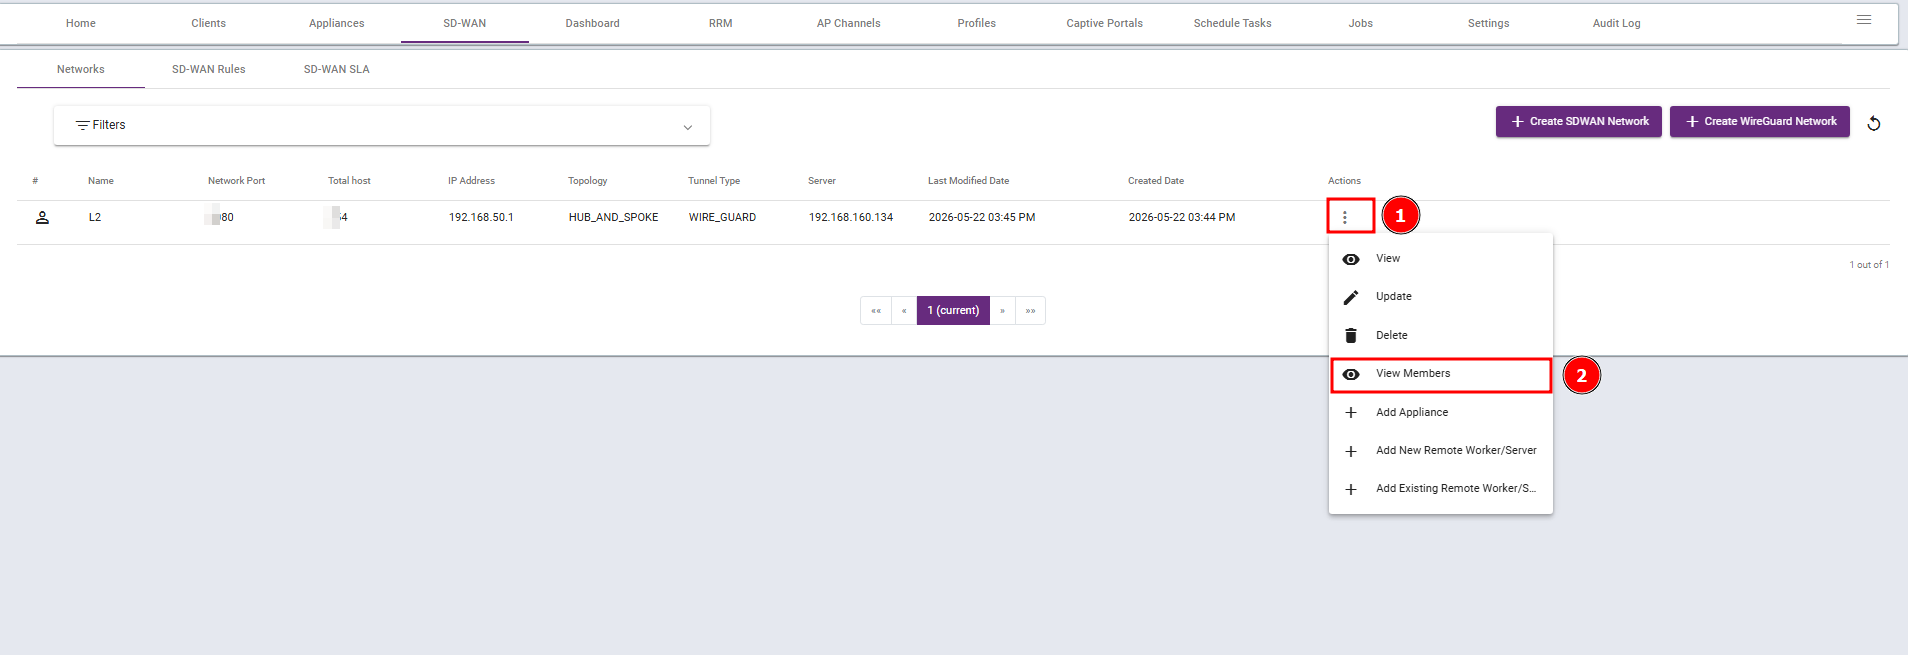
Step 4: Add Hub Appliance
Make sure this IP is reachable from the Spoke appliance, and the selected port is allowed in the firewall.
Click on Next.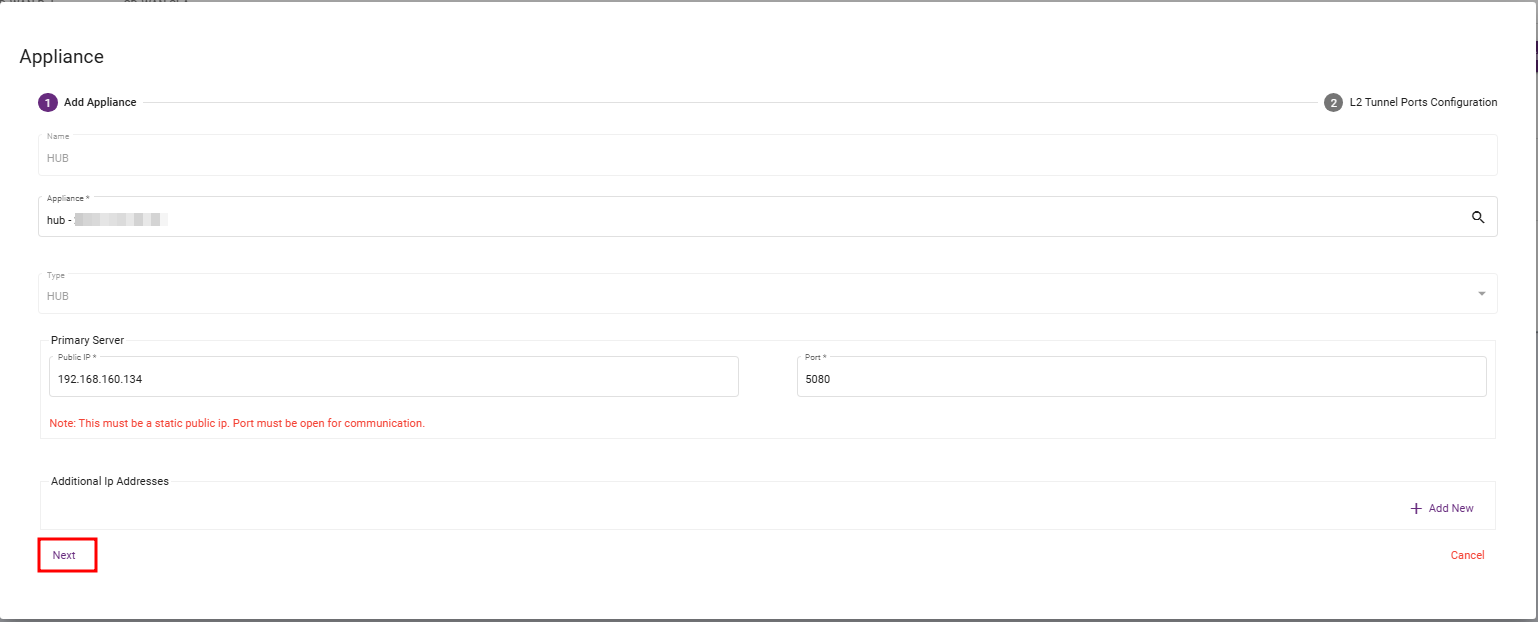
Step 5: Configure Hub L2 Tunnel Port
In the L2 Tunnel Ports Configuration section, select the LAN port that will be used for the L2 tunnel.
Port VLAN ID: Enter the VLAN ID that will be used for the L2 tunnel.
Port IP Address: Enter the IP address for the testing VLAN to verify tunnel connectivity, if required. Otherwise, leave this field blank.
Click Save.
The Hub appliance is now added to the WireGuard L2 tunnel.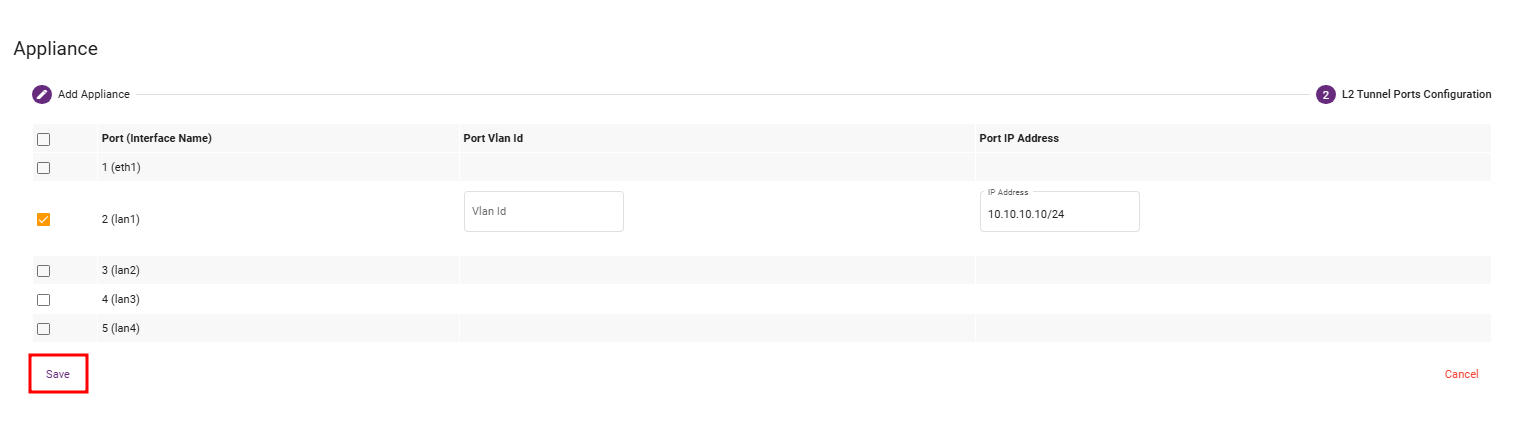
Step 6: Add Spoke Appliance
Go back to the Members page.
Click on Add Appliance again.

Enter the name as:
SPOKE
Select the Spoke appliance from the appliance list.
The appliance type should be selected as:
SPOKE:Xx:XX:xx:Xx:xX
For the Spoke, public IP and port are not mandatory in normal Hub-and-Spoke deployment because the Spoke initiates the tunnel connection towards the Hub.
Click on Next.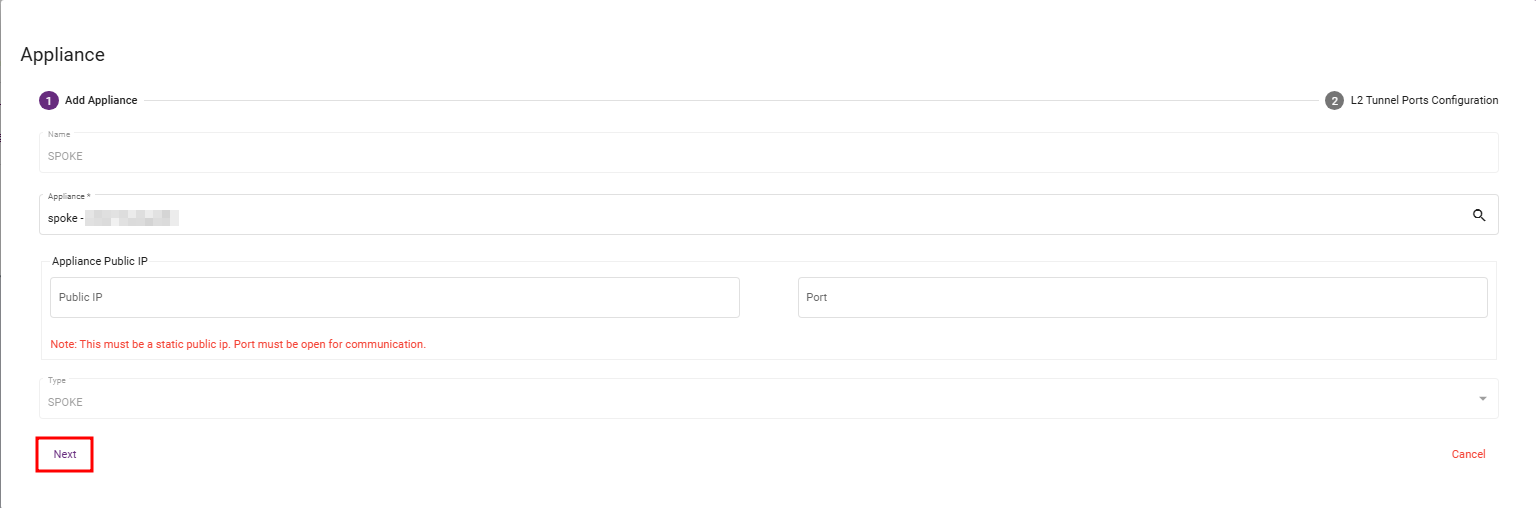
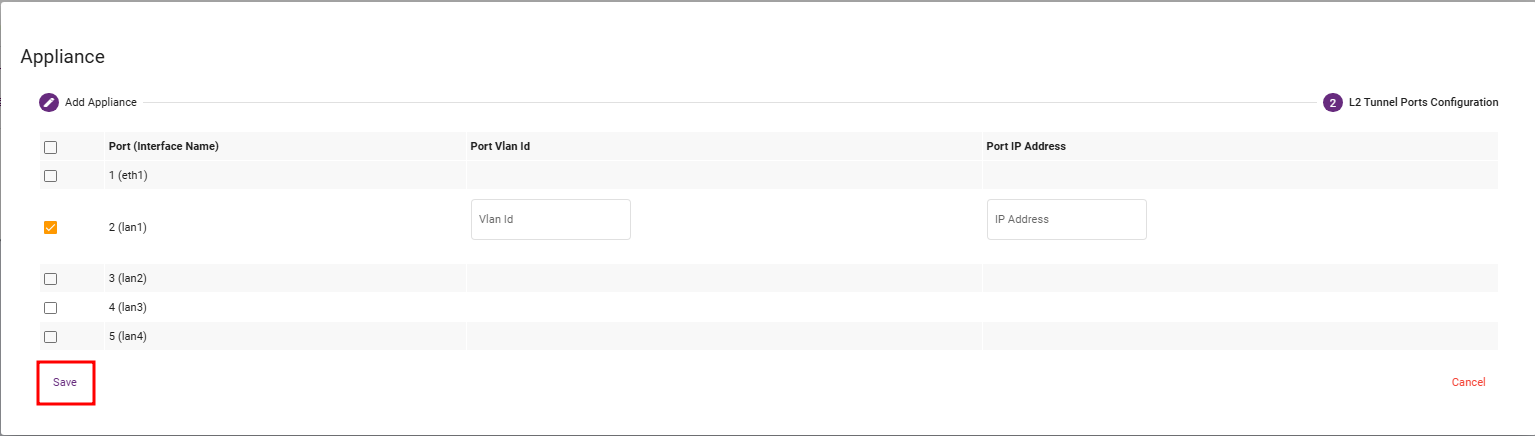
Step 7: Configure Spoke L2 Tunnel Port
In the L2 Tunnel Ports Configuration section, select the LAN port that will be used for the L2 tunnel.
Port VLAN ID: Enter the VLAN ID that will be used for the L2 tunnel.
Port IP Address: Enter the IP address for the testing VLAN to verify tunnel connectivity, if required. Otherwise, leave this field blank.
Click Save.
The Spoke appliance is now added to the WireGuard L2 tunnel.
Step 8: Verify Tunnel IP Reachability
After adding both Hub and Spoke appliances, verify that the WireGuard tunnel is up.
Hub tunnel IP example:
192.168.50.1
Spoke tunnel IP example:
192.168.50.2
From the Hub appliance, ping the Spoke tunnel IP:
ping 192.168.50.2
From the Spoke appliance, ping the Hub tunnel IP:
ping 192.168.50.1
If both tunnel IPs are reachable, the WireGuard tunnel is working.
Step 9: Connect PCs for L2 Testing
Connect one PC to the selected Hub LAN port.
Connect another PC to the selected Spoke LAN port.
Set static IP addresses on both PCs in the same subnet.
Hub-side PC example:
10.10.10.20/24
Spoke-side PC example:
10.10.10.30/24
Now test PC-to-PC ping.
From Hub-side PC:
ping 10.10.10.30
From Spoke-side PC:
ping 10.10.10.20
If the ping is successful, Layer 2 connectivity over the WireGuard tunnel is working.