
Route-Based IPsec VPN Tunnel Configuration Guide
A Route-Based IPsec VPN is an IPsec VPN where traffic is forwarded through a virtual tunnel interface, commonly known as VTI. Instead of only depending on policy-based subnet matching, the traffic is routed using static routes or dynamic routing through the tunnel interface.
In this setup, the Left device and the Right device are connected using an IPsec route-based tunnel. The tunnel interface IPs are used as next-hop gateways for routing LAN-to-LAN traffic between both devices.
How It Works: Tunnel Creation
A route-based IPsec VPN creates a virtual tunnel interface on both devices.
For this setup:
Left Tunnel IP: 10.10.10.1/30
Right Tunnel IP: 10.10.10.2/30
Both tunnel IPs belong to the same tunnel network:
10.10.10.0/30
This tunnel network is used only for routing between the Left and Right devices.
Traffic Routing
In a route-based VPN, traffic is sent into the tunnel using routing.
For example:
Left LAN: 172.16.10.0/24
Right LAN: 172.20.20.0/24
On the Left device, a static route is added for the Right LAN:
172.20.20.0/24 via 10.10.10.2
On the Right device, a static route is added for the Left LAN:
172.16.10.0/24 via 10.10.10.1
When traffic from the Left LAN wants to reach the Right LAN, the firewall checks the route and forwards the traffic through the VTI tunnel interface.
1. Left tunnel configuration
Step 1: Create Tunnel Profile

Step 2: Configure IKE Version and Tunnel Mode and Local Network Details.
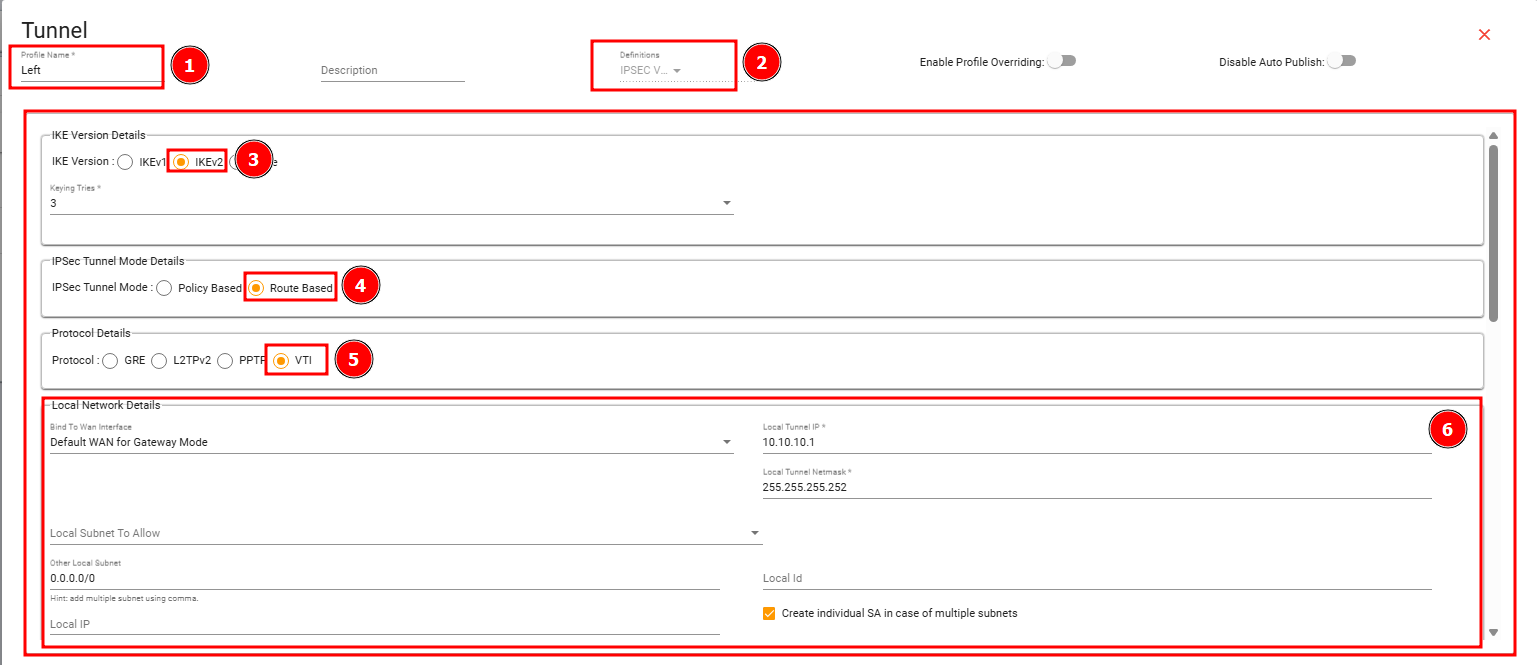
Step 3: Configure Remote Network Details and Authentication Details (PSK)

Step 4: Configure Phase 1 and Phase 2
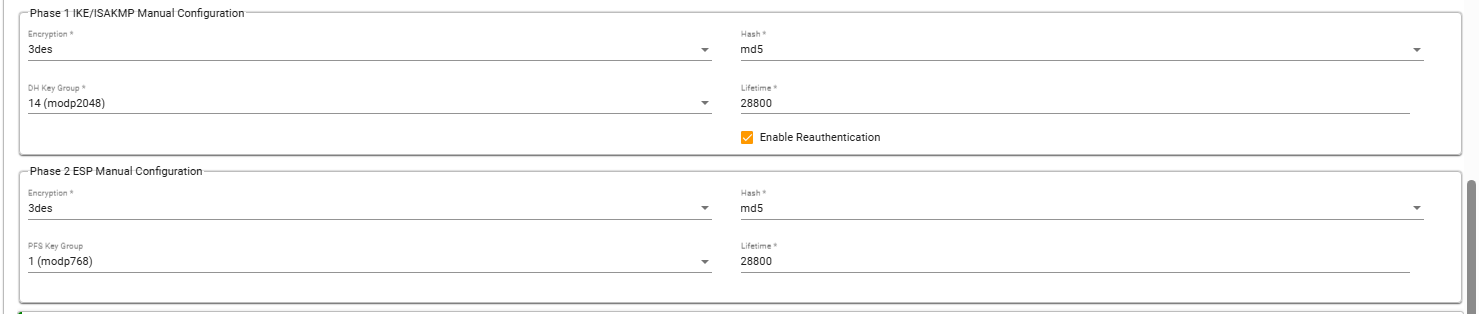
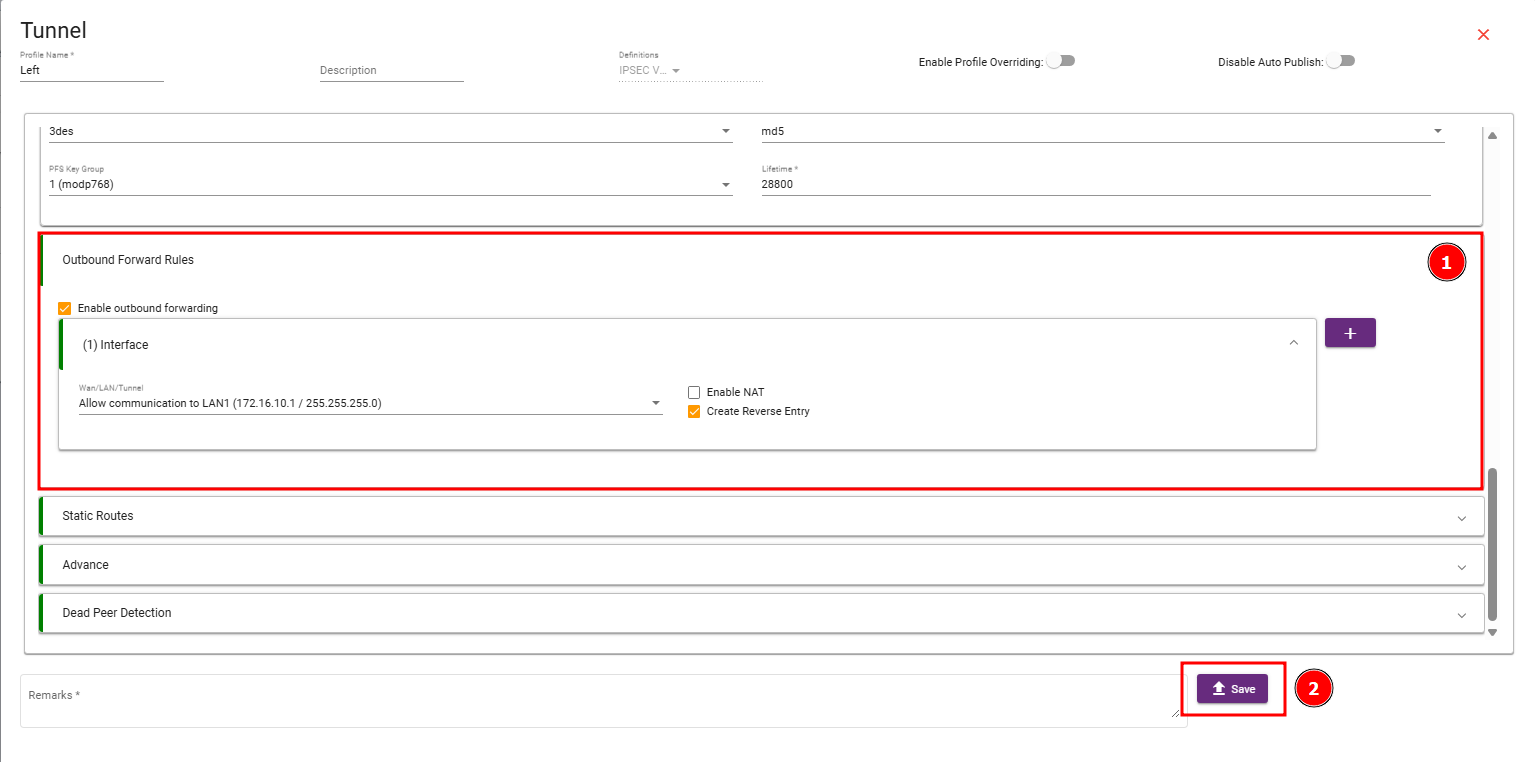
Step 5: Configure Outbound Forward Rule and Save Tunnel Configuration.
NAT should not be enabled for site-to-site VPN traffic because the original source and destination IP addresses must be preserved.
1.1 Static routing
After creating the route-based tunnel, static routing must be configured on the Left device.
Profiles → Static Routing → Create Static Routing

Create a static route for the Right LAN.
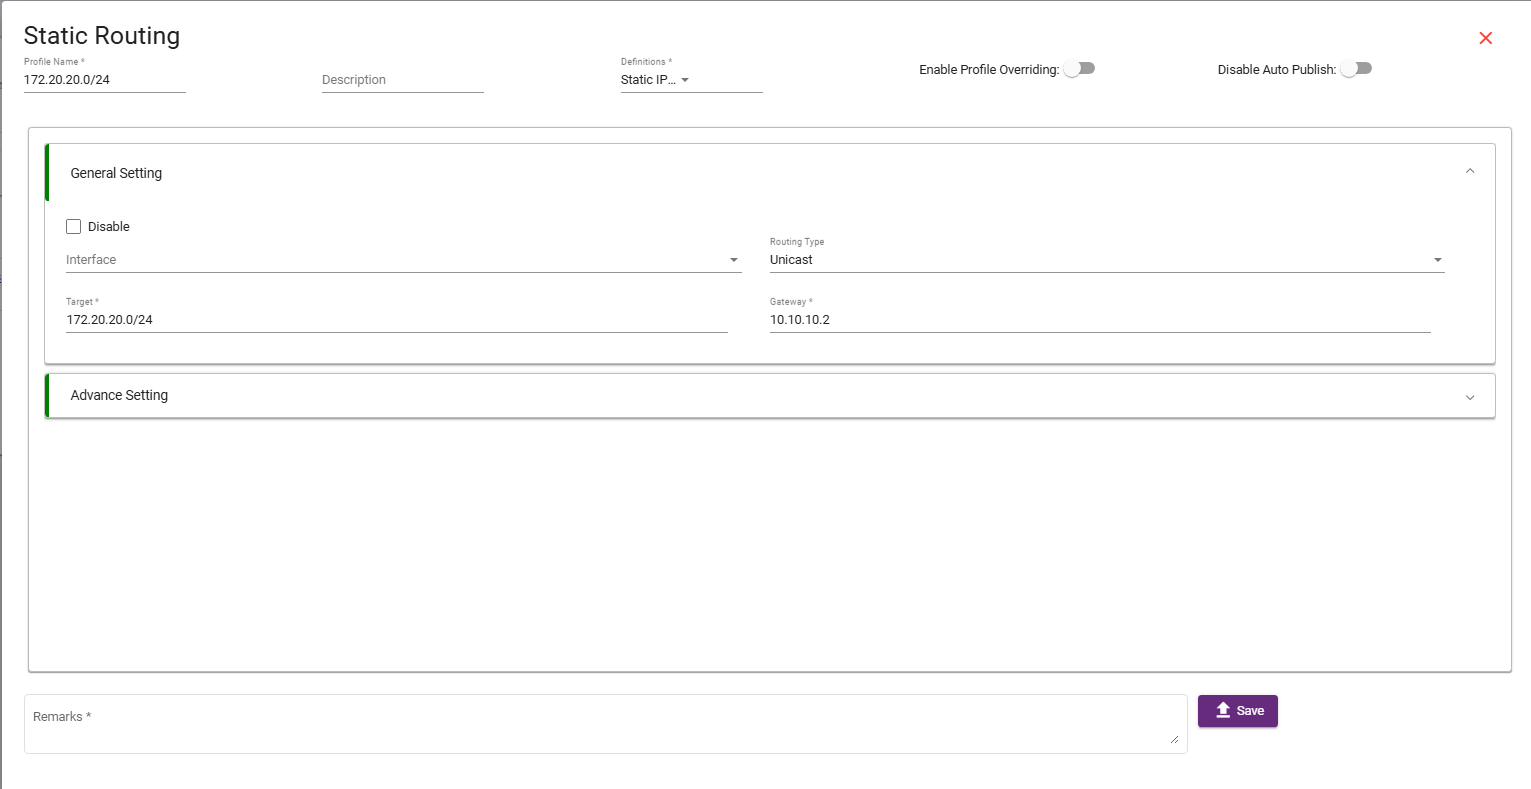
This route means that any traffic from the Left device going toward the Right LAN will be forwarded through the Right tunnel IP.
Left route:
172.20.20.0/24 via 10.10.10.2
2. Right tunnel configuration
Step 1: Create Tunnel Profile

Step 2: Configure IKE Version and Tunnel Mode and Local Network Details.
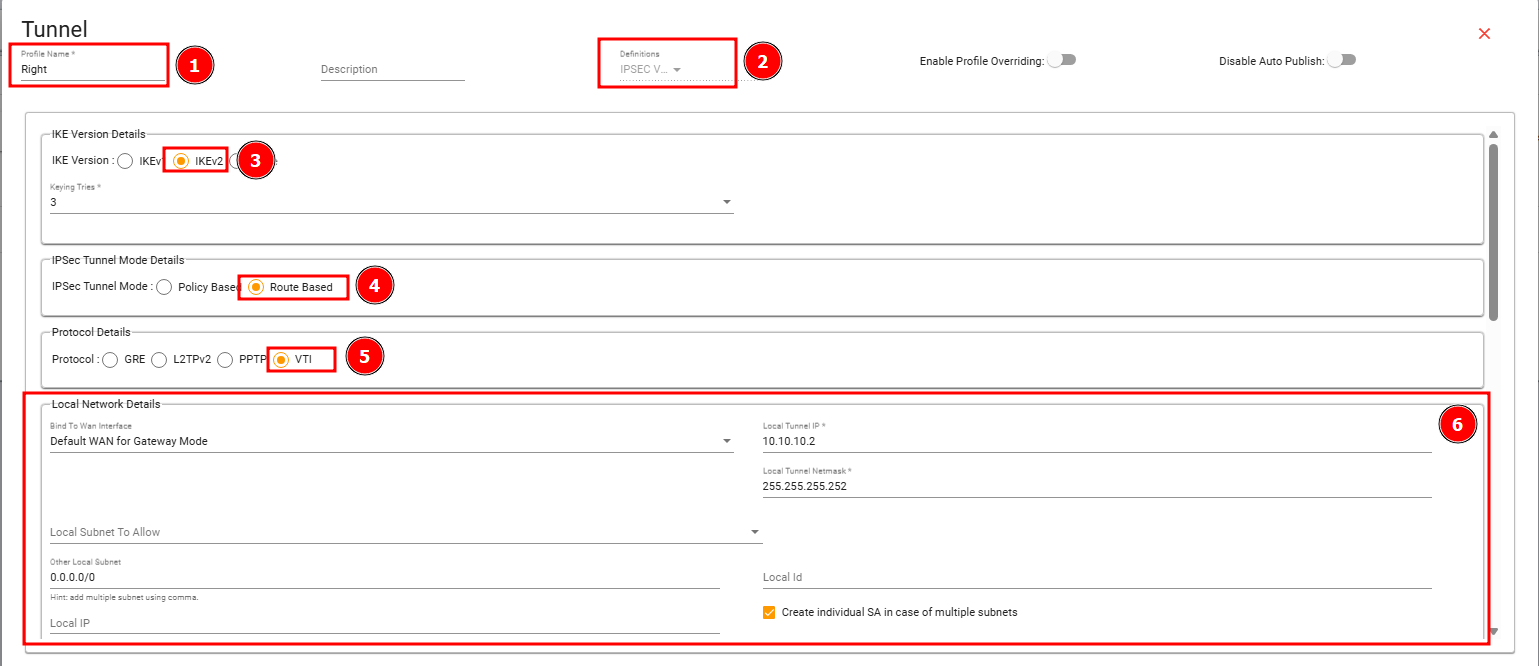
Step 3: Configure Remote Network Details and Authentication Details (PSK)

Step 4: Configure Phase 1 and Phase 2
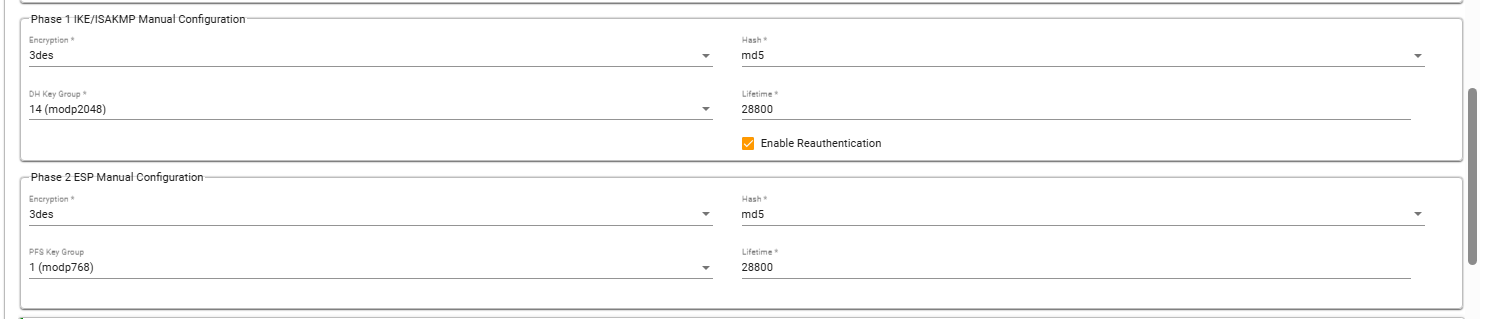
Step 5: Configure Outbound Forward Rule and Save Tunnel Configuration.
NAT should not be enabled for site-to-site VPN traffic because the original source and destination IP addresses must be preserved.
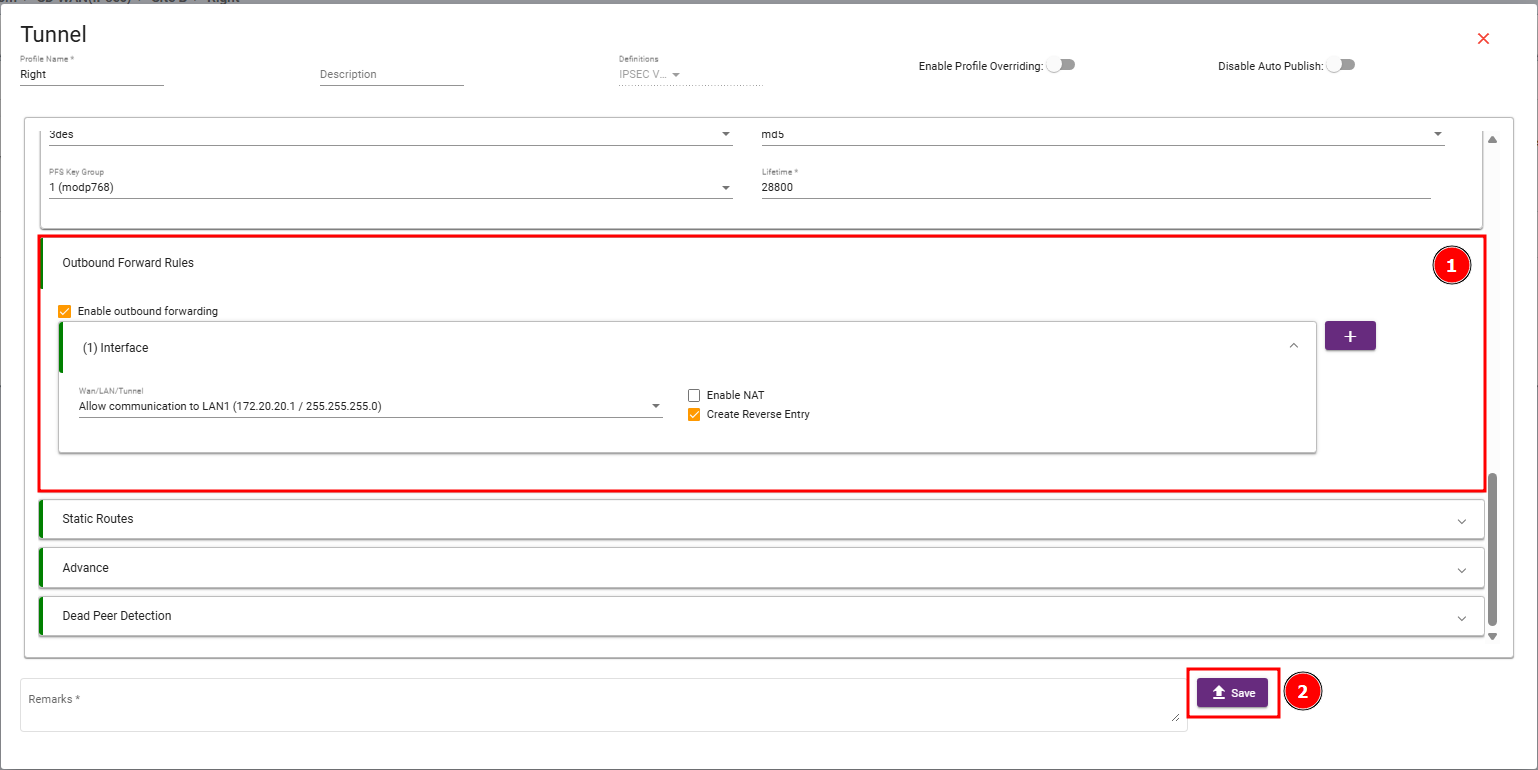
After creating the route-based tunnel, static routing must be configured on the Left device.
Profiles → Static Routing → Create Static Routing

Create a static route for the Right LAN.
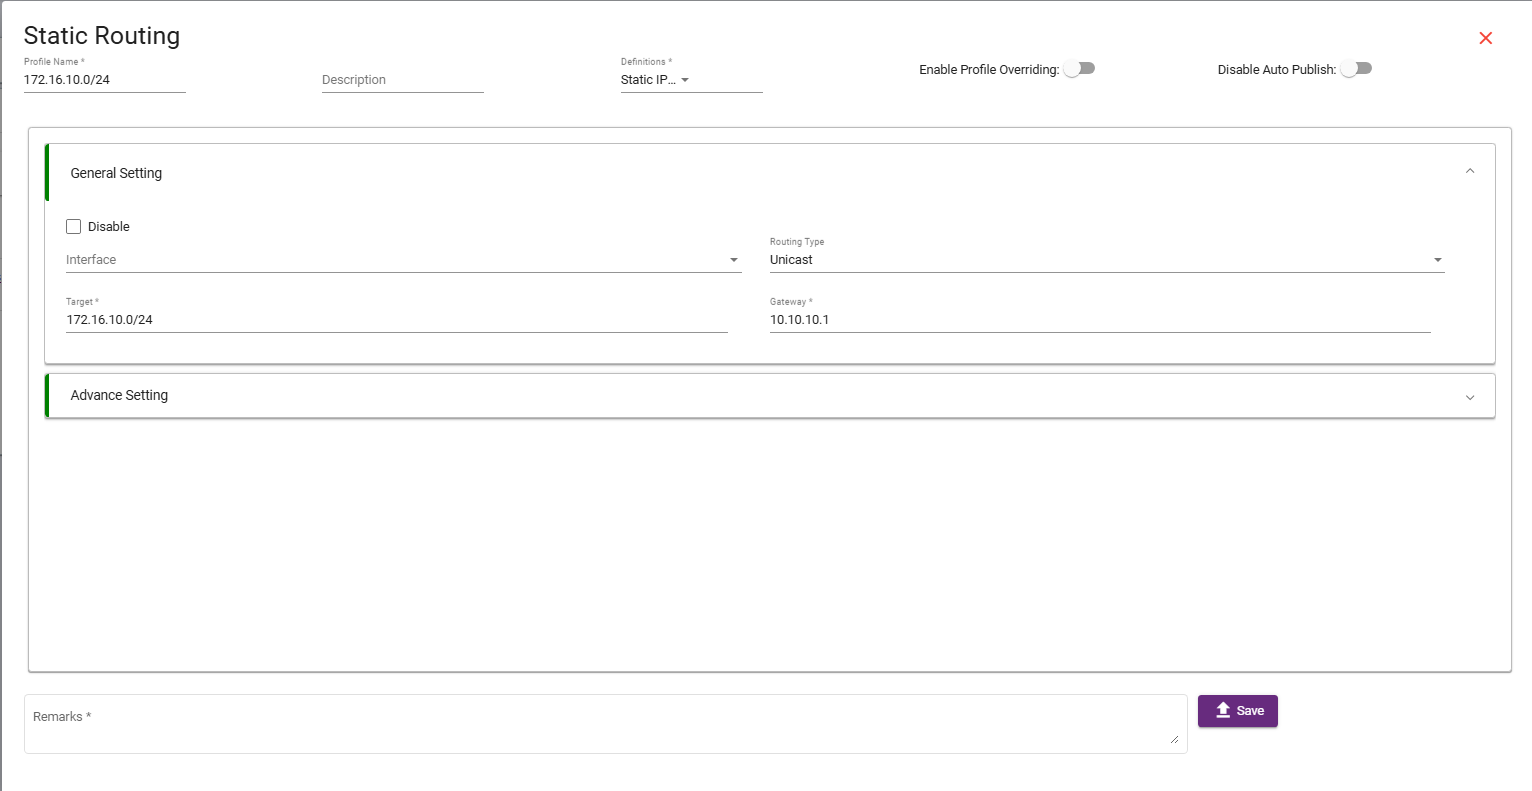
This route means that any traffic from the Right device going toward the Left LAN will be forwarded through the Left tunnel IP.
Right route:
172.16.10.0/24 via 10.10.10.1